
Open Event Form
Click the Event Form button on the navigation bar at the top of the screen to open a new 25Live Pro Scheduling Event form.

Basic Details:
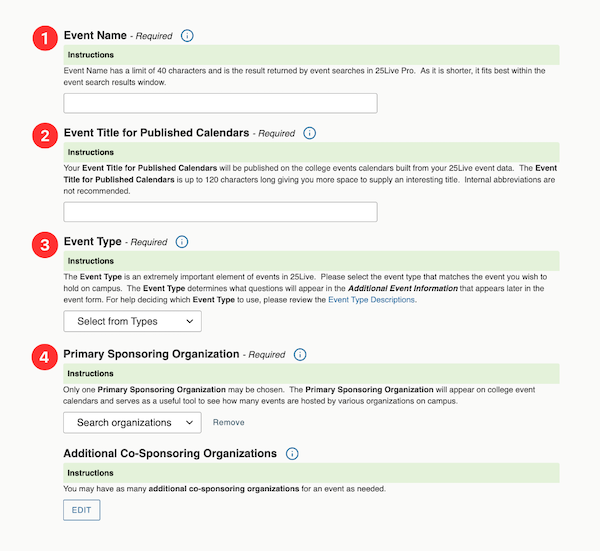
Starting at the top of the form, enter event details. You must complete all required fields to save your request.
1. Event Name: Enter a name that clearly describes the event. You may enter up to 40 characters. This name will live only in 25Live and is used for administration and reporting.
2. Event Title for Published Calendars: You may enter up to 120 characters. If you intend for your event to be on a public facing calendcar, please follow the guidelines below when creating your Event Title for Published Calendars.
- Keep titles concise and clear. Titles should ideally be less than 65 characters long, including spaces.
- Longer event titles may be truncated with an ellipsis in some calendar views.
- Do not include the words App State or Appalachian State in the title.
- Do not use abbreviations.
- Principal words should be capitalized. Do not capitalize words like “a,” “and”, “in,” “of” or “the” unless they are the first words of the title. Do not use all caps.
- Single quotation marks should be used around the titles of books, plays, magazines, newspapers, TV shows and movies.
- Event titles should not include details like event sponsor. These details should be included in the event description.
- Numbers 0-9 should be written out. Numbers that are 10 or higher should use the figure.
- Please proofread titles for proper grammar and spelling.
3. Event Type: Select the Event Type that best describes the event. For help selecting an event type, please review the event type descriptions in the List of Event Types.
*If you are a student, you are limited to a few event types, including Student Club Event, Practice, and Rehearsal.
4. Primary Organization: Indicates the event host, e.g. your department or club name. Additional co-sponsoring organizations may also be added.
* Students who receive an error that their organization is locked, frozen, or inactive should reach out to Campus Activities at campusactivities@appstate.edu. Once your organization is back in good standing, you will be able to request space on campus.
Attendance and Details:
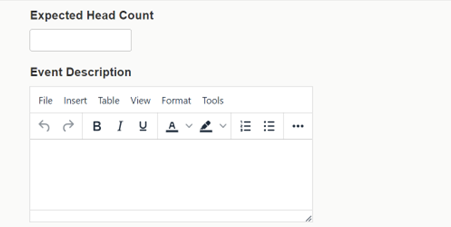
1. Enter an Expected Head Count for the event.
- This information is used to find a room appropriate for the number of attendees and is also sent to Service Providers.
2. Add an Event Description.
- Event description should provide a sense of who, what and how. Briefly explain who is speaking or performing and what attendees can expect to see or hear. For calendar events, descriptions should be at least three sentences long and answer the questions who, why, what, and how. An example description is available in our submission guidelines.
- List co-sponsors and note if the event is free and open to the public. Events not open to the public should include the following disclaimer in the event description: “This event is open to App State students, faculty and staff.
- Note: If you include your location, date, or time, remember to update this information in your description if you make changes to your location, date, or time in your event form.
Date and Time:
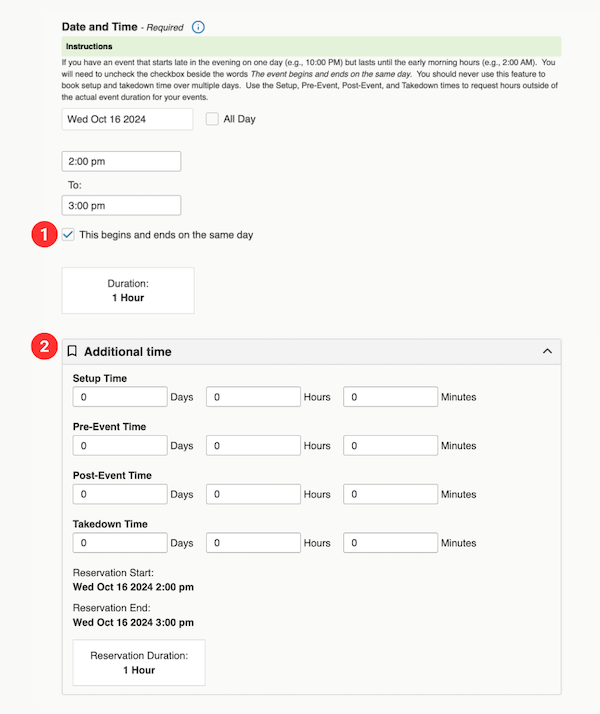
Next, specify the date and time of the event. If the event occurs on multiple days, you will enter details in the next step.
1. “The event begins and ends on the same day”: Your event will likely start and end on the same day. There are very few cases where you would need to uncheck this selection. An example where this might occur is if you are having an event that starts at 10:00 pm and ends the next day at 1:00 am.
2. Additional Time: You may add extra time for setup & takedown or pre & post-event activities. This will add time to the duration of the reservation, but will not be shown on an external calendar. For example, you may need 30 minutes to setup for the event and another 15 minutes to allow guests to arrive before the event starts. This will add 45 minutes to the duration of your reservation, but the extra time will not be included on an external calendar.
Multi-Day Events:
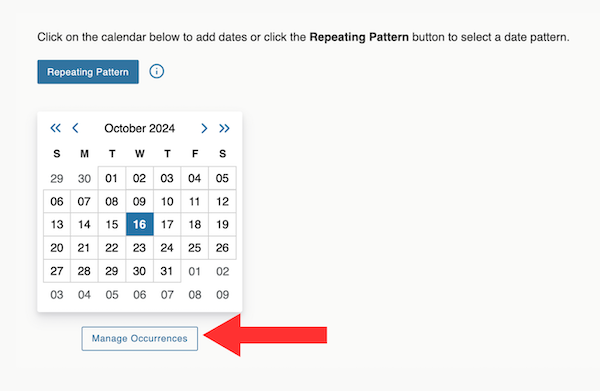
In the calendar, the date you specified in the previous section will appear. If your event occurs on more than one day, please use the calendar to select additional dates. A list of your selections will appear alongside the calendar. If necessary, you may adjust event hours for any date by clicking on the Manage Occurrences button.
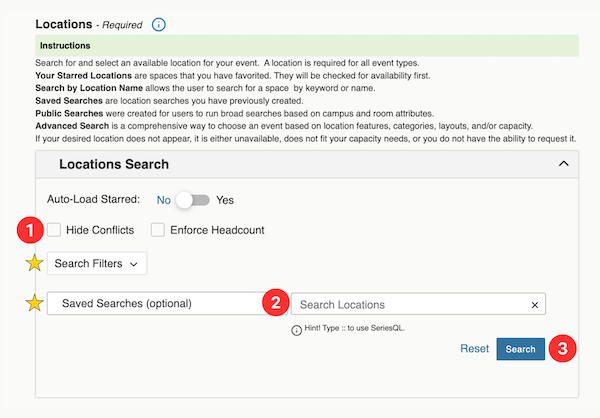
Location Search:
1. Hide Conflicts & Enforce Headcount: These options should be unchecked to see all conflicts and potential rooms.
2. Search by location name, if you know the location you want for your event. You can either use the building code or building name. For example, you can search using PSU or Plemmons Student Union.
*Alternate ways of searching for rooms are by using Search Filters or Saved Searches. Search Filters let you select categories, features, layouts, and capacities. Saved Searches include a defined set of locations that may be public searches or searches created and saved by you.
3. As you search, 25live will check venue availability based on the dates and times specified.
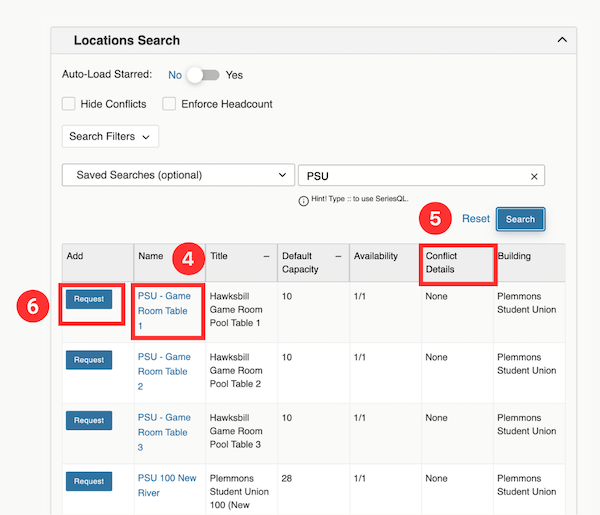
4. Select linked titles to view location details.
5. If applicable, click on Conflict Details to view why a location is not available.
6. Once you have identified the location you would like to request, click the Request button. This will add the location to the event form.
*Please note, if your event will need more than one room you can request mutliple rooms in a single event request.
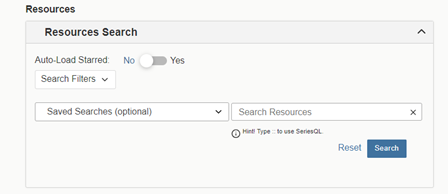
Resource Search:
Resources are items that need to be brought into the event location. Examples of resources are extra tables, podiums, microphones, etc. Please note that the only resources currently available for search and selection are Hayes School of Music (HSOM) resources in the Broyhill Music Center. If you require resources for a location other than Broyhill Music Center, please include your request in the comments section below.
1. Search by resource name, if you know the resources you want for your event. Resources are generally tied to a building or department. For example, all resources for the Hayes School of Music will include "HSOM” in the name, allowing you to use this as a search term.
2. As you search, 25live will check resource availability based on the dates and times specified. Select linked titles to view resource details. If applicable, click Conflict Details to view related information.
3. Once you have identified the resource(s) you would like to request, click the Request button. This will add the resource to the event form.
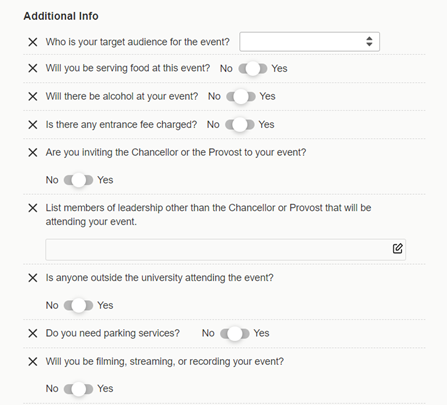
Additional Information:
Depending on the event type you selected earlier in the event form, you may have questions that need to be answered in order to complete the form. Below is an example of questions you may see on the event form.
Event Comments:
Event Comments: You may leave additional notes about your event for related staff in the Event Comments box.

Save Event:
In the section after Saving This Event, you may choose the area of 25Live where you want to be taken after saving the event form.

Tips:
- The option to Cancel the event form is always available in the bottom right corner of the page, alongside the options to Preview and Save. If you select Cancel, be aware that your selections or changes will not save.
- Do not simply close your browser to cancel the event form. If locations and resources have already been selected, they will be locked as pending, restricting other users from requesting them. Please be sure to click Cancel.
- The event request reference number is displayed after the event is saved. You can use this number later to quickly find the event in 25Live.
Get Help:
- For additional assistance, contact the Office of University Events Scheduling and Communications at uesc@appstate.edu to inquire about training sessions.